

7 Steps to Prepare a Logo for Embroidery
Last Updated: October 27, 2026
Quick Summary
To prepare a logo for embroidery, send your cleanest source artwork (vector AI, EPS, PDF or SVG first, or a PNG/JPG at 300 dpi minimum) along with finished design dimensions in millimetres, placement, garment type and fabric, thread colour references and any text typed out separately. Your logo for embroidery must then be digitised into a machine stitch file such as DST, PES or EMB, because embroidery machines read stitch files, not pictures.
- Vector files like AI, EPS, PDF and SVG are the cleanest starting point for digitising.
- Avoid screenshots, photos of business cards and web images as source artwork.
- Placement matters because it changes the maximum design size and best stitch direction.
- Digitising runs from import and crop through stitch types, layering, underlay and export.
- Test the smallest and largest sizes on the actual fabric before approving a sample.
Table of Contents
- Start With the Right Source File for Your Logo
- Embroidery Logo File Formats You Can Actually Use
- How to Digitise a Logo for Embroidery
- Simplify the Design Before It Reaches the Machine
- Minimum Text Size for Embroidery and Fine Detail Limits
- Match the Artwork to the Fabric and Garment
- Your Embroidery Logo Sample Approval Checklist
- Order Your Digitised Logo and Get Sewing
- Frequently Asked Questions
Start With the Right Source File for Your Logo
At Dprintclothing, we have specialised in custom apparel since 2015.
- Vector files: AI, EPS, PDF, SVG
- Raster files: PNG or JPG at 300 dpi minimum
- Avoid: screenshots, photos of business cards, web images
Embroidery Logo File Formats You Can Actually Use
Not every file type survives the trip to a machine. Embroidery machines read stitch files, not pictures, so someone has to convert your artwork into stitches first. The single most useful distinction to understand is between editable artwork (the design itself) and a machine stitch file (the sewable output). They are not interchangeable, and confusing the two is the most common handoff mistake.
Here is how the common formats stack up:
Format |
Type |
Embroidery-Ready? |
Best Use |
|---|---|---|---|
AI / EPS |
Vector |
Needs digitising |
Cleanest starting point |
Vector or raster |
Depends on export |
Check it is vector |
|
SVG |
Vector |
Needs digitising |
Web logos, simple shapes |
PNG / JPG |
Raster |
Needs digitising |
Only if 300 dpi+ |
DST / PES / EMB |
Stitch file |
Yes |
Machine-ready output |
What to Send With Your Logo
A clean file on its own is not a complete handoff. The digitizer needs context to produce a file that actually works on your garment. Send the following together:
- The source artwork in the cleanest format you own (vector first, high-resolution raster second).
- Finished design dimensions in millimetres, width and height at the size it will be stitched, not the size it appears on screen.
- Placement, left breast, centre chest, back, sleeve or cap, because placement changes the maximum design size and the stitch direction that works best.
- Garment type and fabric, a polo, a fleece hoodie and a cap all demand different underlay and density settings.
- Thread colour references, brand colour codes or physical thread swatches if you have them, rather than screen colours.
- Any text typed out separately, so spelling and font choices are unambiguous.
- A note on which elements are essential, if the logo must be simplified, the digitizer needs to know what cannot be dropped.
Editable Artwork vs Machine Stitch Files
A common pattern is for a business to hold only a web PNG and a previous stitch file. That combination is workable but limiting: the PNG may be too soft to redraw cleanly, and the old stitch file may be locked to a size and fabric that no longer apply. Request the editable source from whoever designed the logo before you commission digitising, it saves rework later.
How to Digitise a Logo for Embroidery
Here is the practical sequence:
- Import the artwork into digitising software.
- Crop away anything outside the logo.
- Set the design size and match it to the placement.
- Assign stitch types to each shape.
- Layer the colours in the right sewing order.
- Add underlay so the design sits on the fabric cleanly.
- Export the machine file and run a test stitch-out.
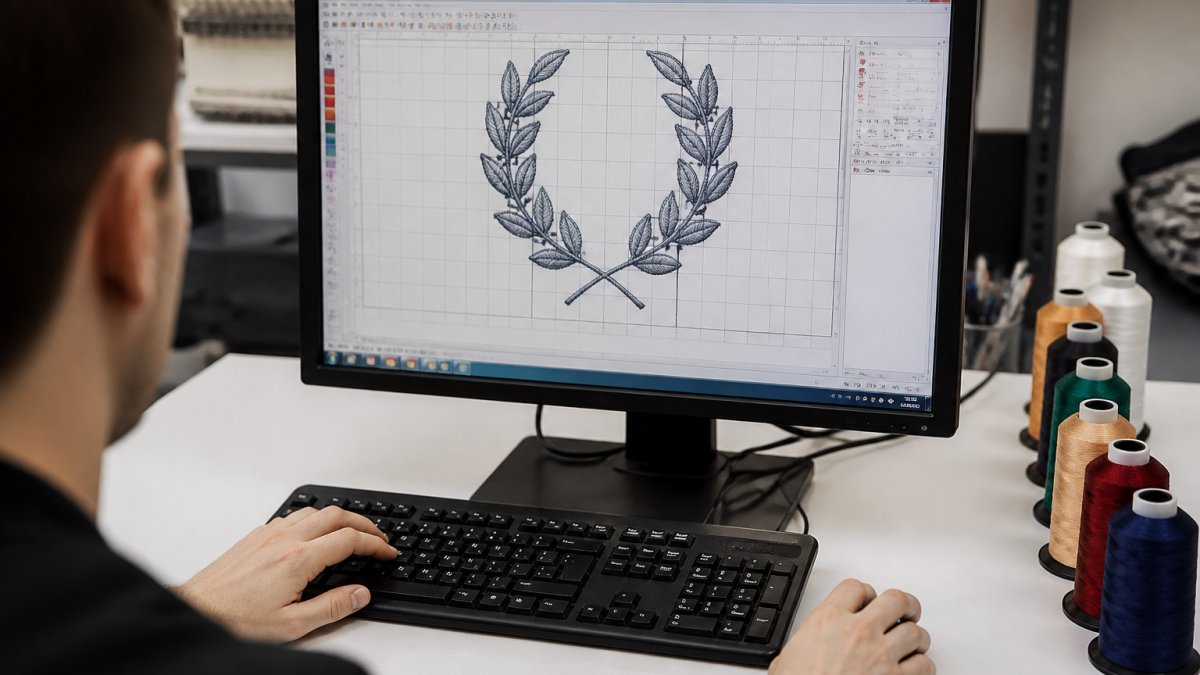
If you would rather hand the job to us, you can order a digitised logo.

Digitising Software vs a Professional Digitizer
A common mistake is assuming software output is always machine-ready. It is not. Density and underlay settings need tuning to the fabric.
Simplify the Design Before It Reaches the Machine
If your design has small embroidered details like badges or rank markings, custom embroidered epaulettes show how compact stitched elements are handled in practice.

Stitch Types, Direction and Density
Three settings decide how your logo actually looks in thread:
- Stitch type: satin for lettering and borders, fill for large areas, running stitch for outlines
- Stitch direction: the angle of the thread, which affects shine and coverage
- Stitch density: how tightly stitches pack, which affects coverage and stiffness
Minimum Text Size for Embroidery and Fine Detail Limits
If you are stitching a small logo onto a hat or beanie, this limit bites hardest. An embroidered cuffed beanie is a good example of where a compact, simplified logo works best.
Match the Artwork to the Fabric and Garment
The same logo stitches differently on a hoodie than on a polo. Fabric weight, stretch and texture all change how the design sits, and the artwork decisions you make before digitising should account for the garment it will land on. This is the step most guides skip, and it is where puckering, distortion and poor coverage originate.
Digitising Combine Back & Breast Logo →
Why Fabric Changes the Stitch Plan
Thread pulls against fabric. On a stable woven shirt the fabric resists that pull; on a stretchy knit it moves with it. Two mechanisms cause most problems:
- Puckering happens when stitch density and underlay pull more fabric into the design than the fabric can recover from. The result is a rippled ring around the logo.
- Distortion happens when a stretchy fabric relaxes after stitching, so the logo shifts or the edges pull in.
Both are managed through underlay, stabiliser and density, not through the artwork alone. But the artwork sets the limits: a dense, detailed logo on a lightweight stretch fabric has far less room to manoeuvre than a simple, bold one.
Stabiliser and Underlay by Fabric Type
Stabiliser is the backing that gives the fabric something to hold onto. Underlay is the foundation stitching laid down before the visible stitches. Together they decide whether the logo sits flat.
- Stretchy knits (jerseys, performance polos): use a cut-away stabiliser and add more underlay. Cut-away keeps supporting the fabric after washing, which matters on stretch garments.
- Heavy fleece and sweatshirts: a denser fill works well because the fabric supports it, but watch overall density so the logo does not become stiff. A medium cut-away stabiliser is a common choice.
- Lightweight fabrics (fine cottons, thin shirts): reduce density and use a lighter stabiliser to avoid puckering. Too much underlay on a thin fabric can be as damaging as too little.
- Caps and structured items: these need specialised cap frames and backing; the curved surface changes how stitch direction reads, so keep the design compact and centred.
Test on the Actual Fabric
A practical pattern is to test the smallest and largest sizes you plan to produce, because stitchability limits bite hardest at small sizes and density problems show most at large ones. Once a fabric and stitch plan pair is proven, record the settings so repeat orders start from a known-good baseline rather than guesswork.
Your Embroidery Logo Sample Approval Checklist
Use this checklist before you sign off:
- Text is readable at the finished size
- Colours match your brand against the garment
- Density looks even, with no fabric showing through
- Edges are crisp, with no jagged or pulled stitches
- Design sits straight and centred at the placement
- No puckering or stiffness around the logo
- Thread colours approved against a physical sample
Order Your Digitised Logo and Get Sewing
You can order a digitised logo from us.
At Dprintclothing, we offer logo digitising. Our digitisers work to keep trims and colour changes down, which helps embroidery programmes run more efficiently on machines. Our digitising products include a breast-size logo, a back-size logo and a combined back-and-breast logo.
Ordering in quantity? Bulk discounts are available.
Frequently Asked Questions
What file format is needed for an embroidery logo?
Dprintclothing offers logo digitising products. Check the relevant product listing for details about what to provide.
Does a logo need to be digitised before it can be embroidered?
Dprintclothing offers logo digitising products. The product listings describe options for breast-size, back-size and combined back-and-breast logos.
What is the minimum text size for embroidery?
The product listings do not specify a minimum text size. Contact Dprintclothing for guidance if you are unsure what you need.
What should you check before approving an embroidered logo sample?
The product listings do not specify a sample approval process. Contact Dprintclothing if you have questions about your order.
Getting a logo ready for embroidery comes down to clean artwork, sensible simplification and a real sample before you commit. If you would rather skip the software learning curve, Dprintclothing can digitise your logo, match it to the right garment and handle bulk orders with fast delivery. Get started with Dprintclothing and turn your logo into durable, professional embroidery.

